Documentation
Thank you for purchasing the People Ghost theme!
We’ll start guiding you through how to set up your Ghost website to fit your needs. Grab a coffee and enjoy this part — let’s do it! 🚀
Installation
- Navigate to
yourdomain.com/ghost/#/settings/design/change-theme. - Click ‘Upload theme’ and select the
people.zipfile included with your purchase. - Once uploaded, click ‘Activate’ to apply the theme.
Your Ghost site is now running on the People theme.
Primary Navigation
The primary navigation appears in the header of your site. Menu items are displayed inline. If there are too many items, the extras will be placed in a dropdown menu.
To manage your primary navigation, go to:yourdomain.com/ghost/#/settings/navigation
Secondary Navigation
The secondary navigation is located in the footer. Menu items are displayed inline.
To manage your secondary navigation, go to:yourdomain.com/ghost/#/settings/navigation
New Posts
New posts label is auto appears everytime new post added and the label remove after about 12 - 24 hours.
Custom Page Templates
We included 2 custom page templates: Tags and Authors. To create a custom page, add a new page and select one of the 2 options from the template dropdown located in the page settings sidebar.
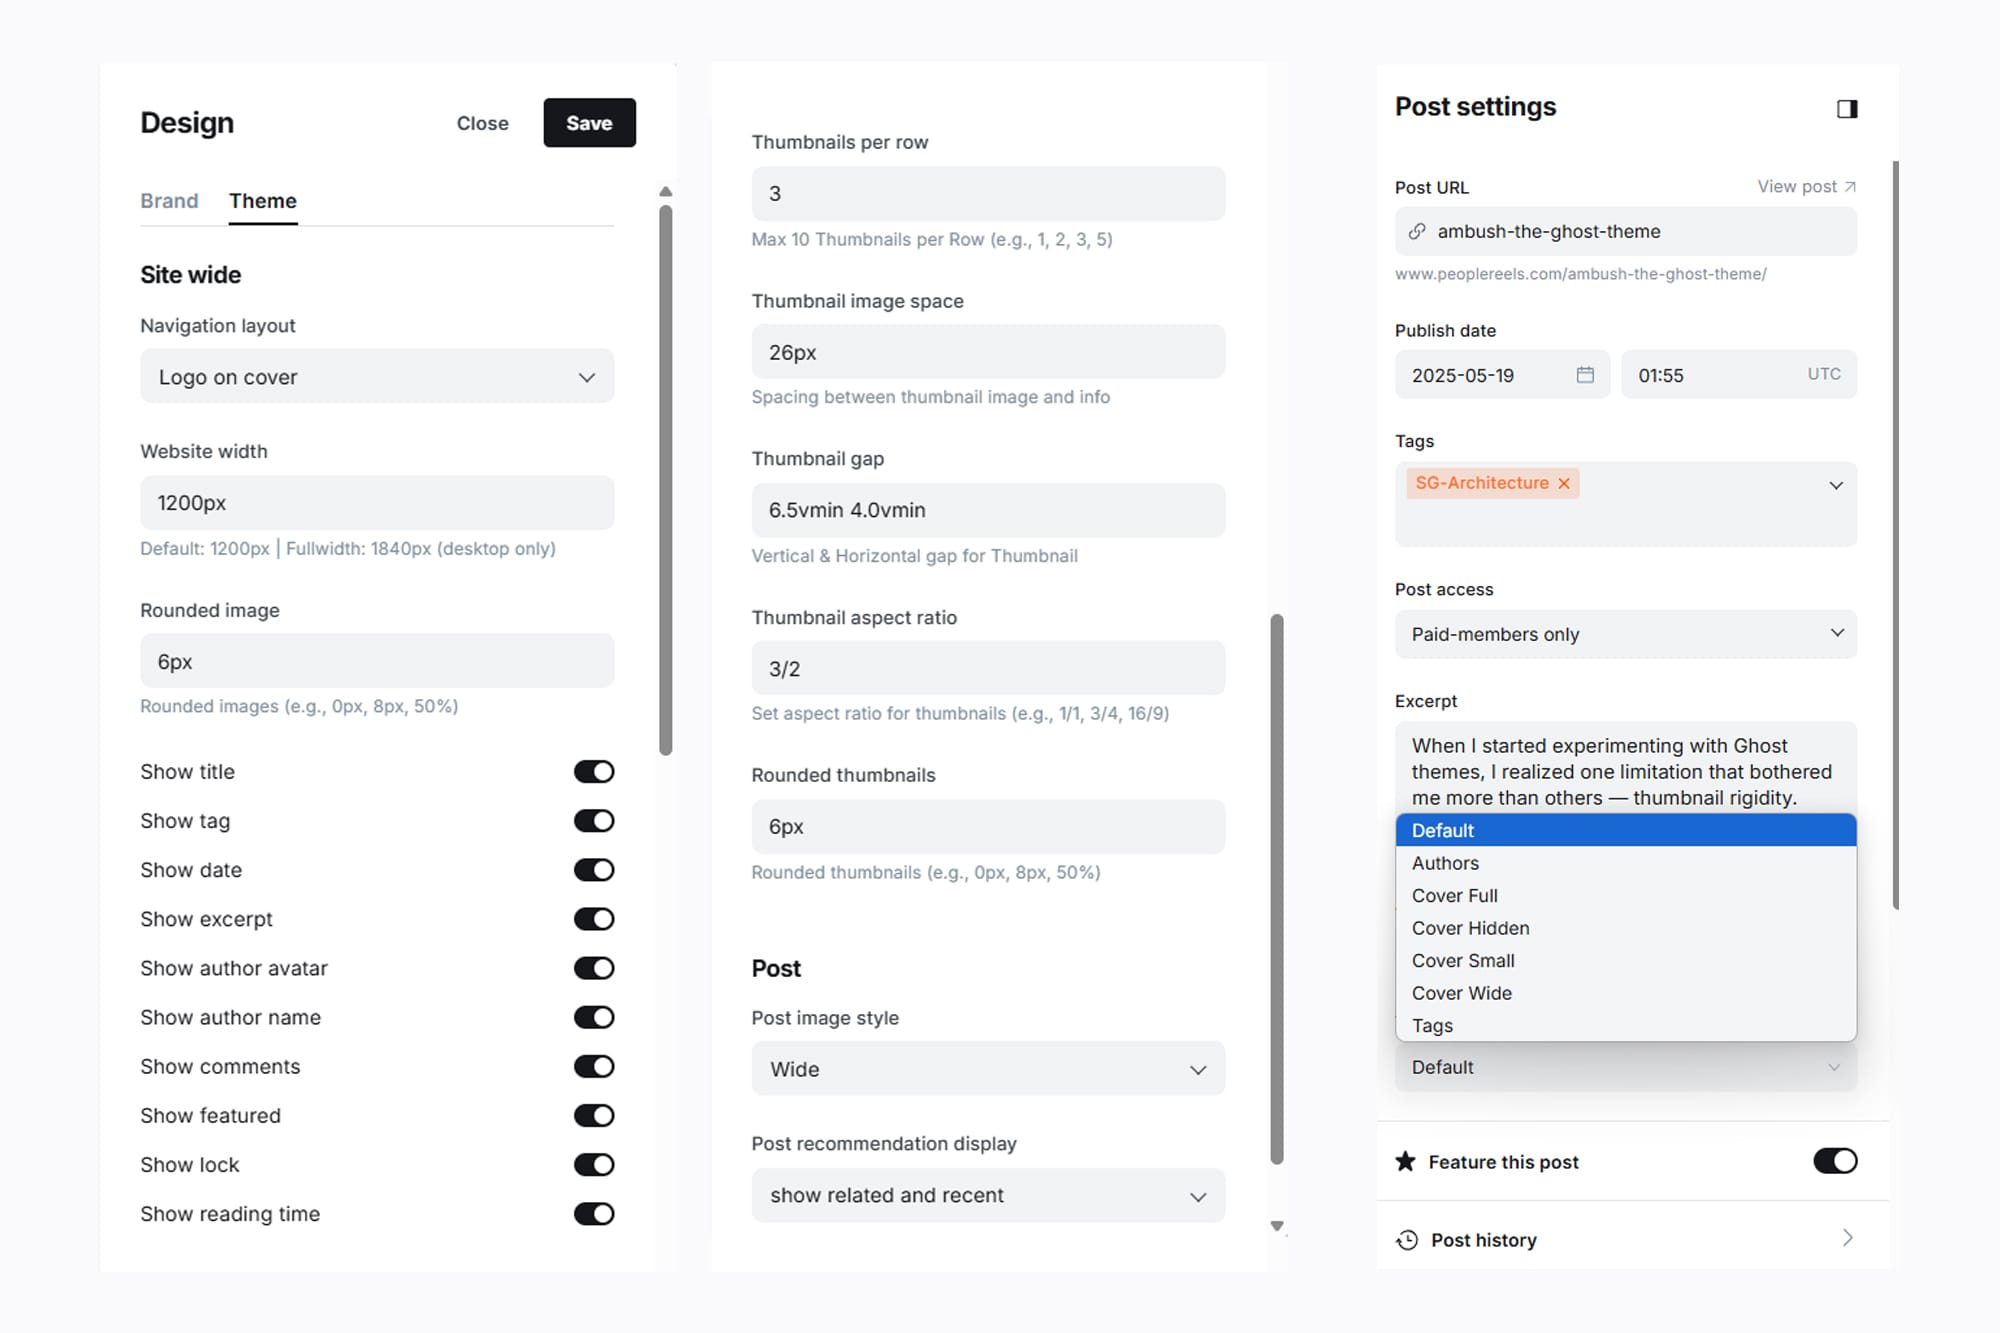
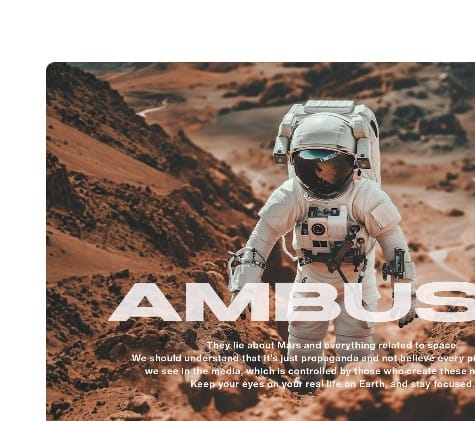
As you can see in the image below, this part is one of the highlights of the People theme. Let’s explore how the theme connects with your ideas. 🤩
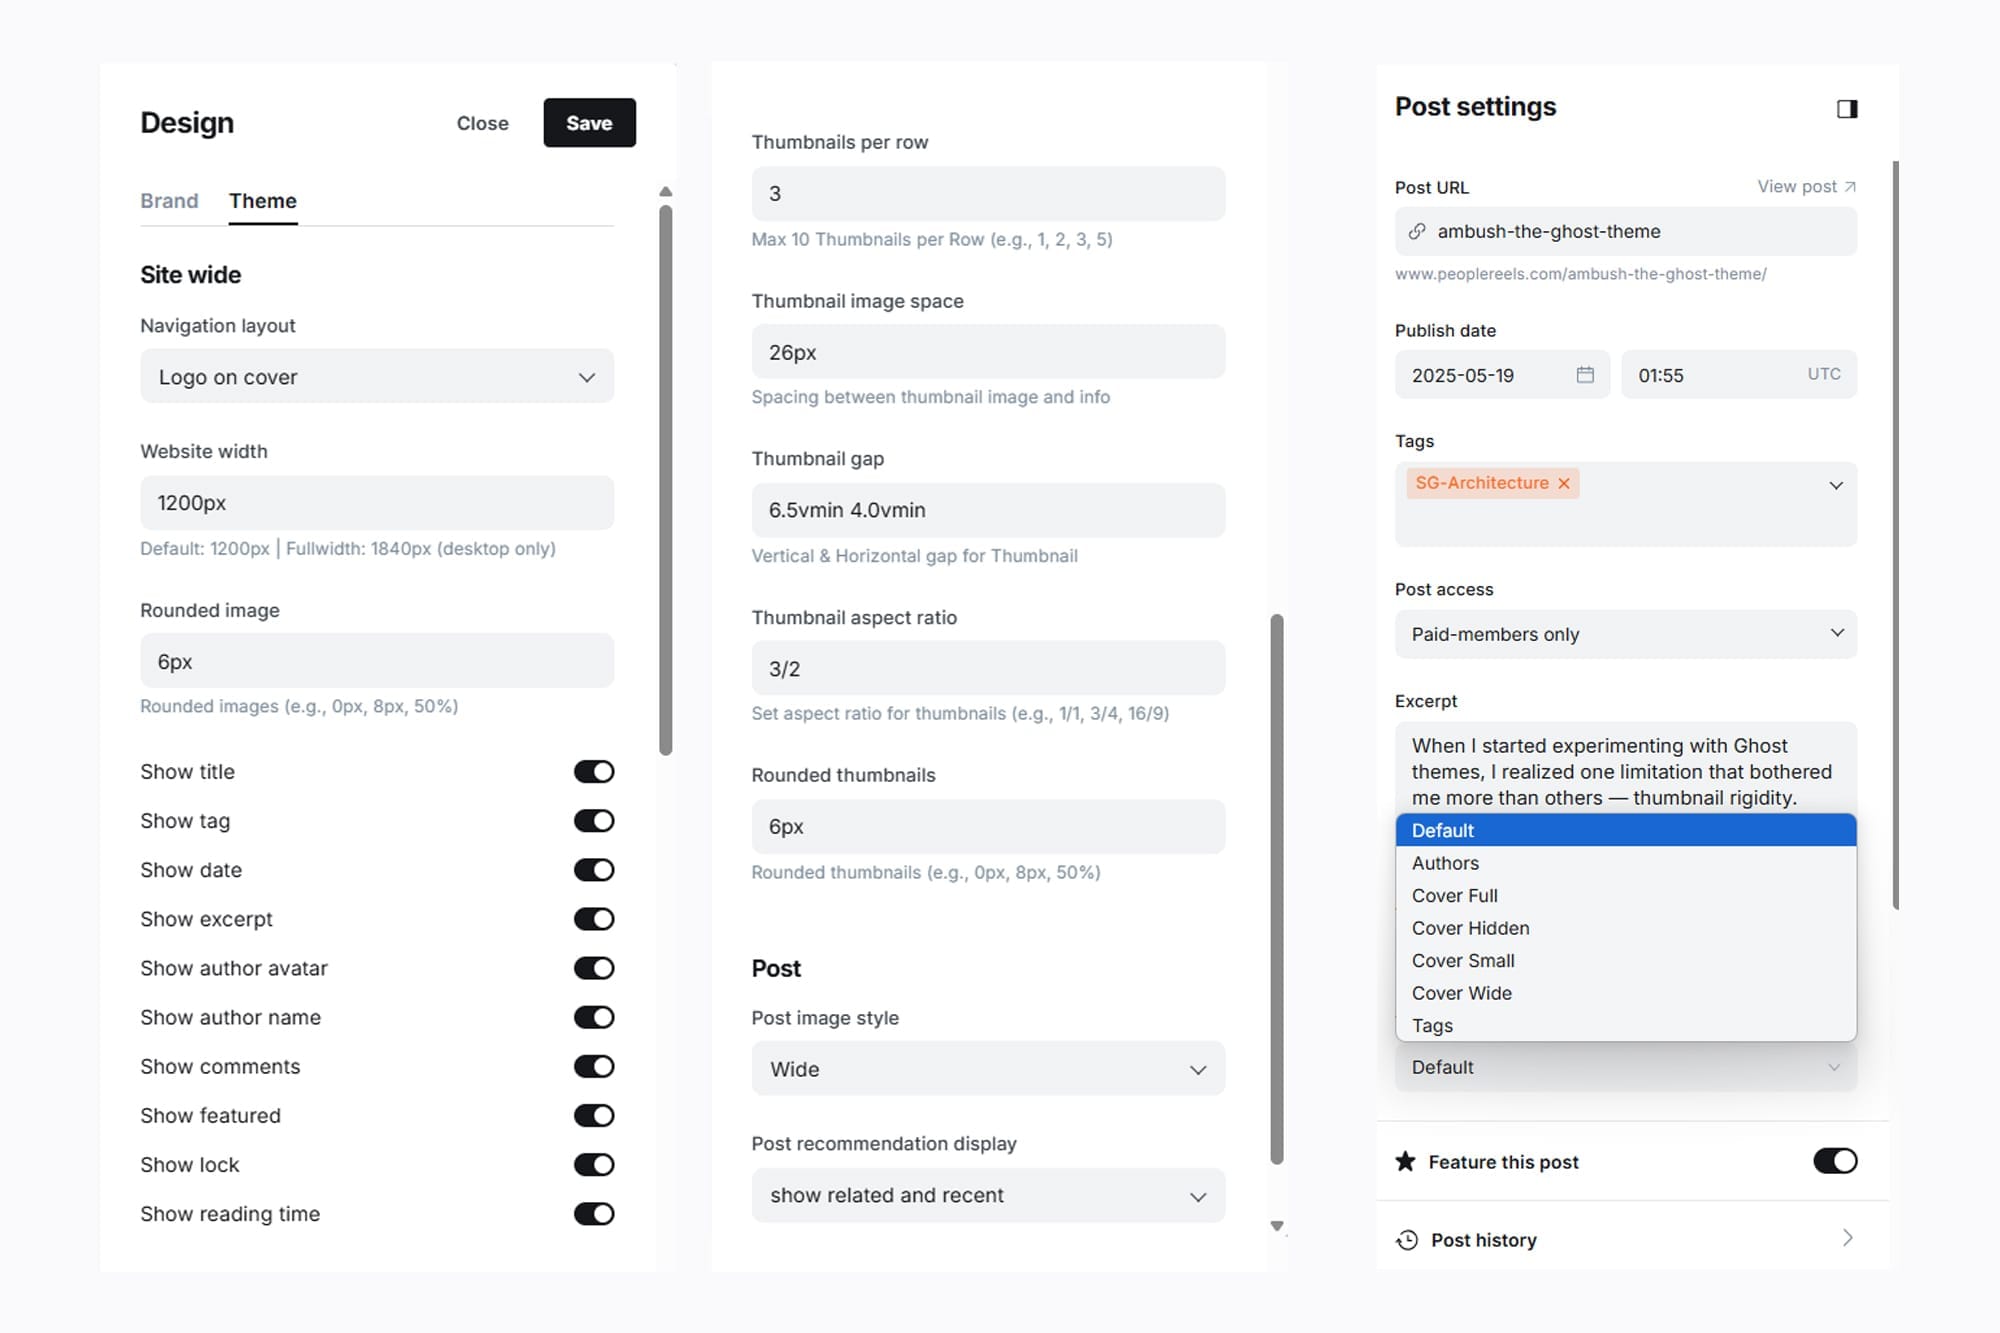
Navigation Layout
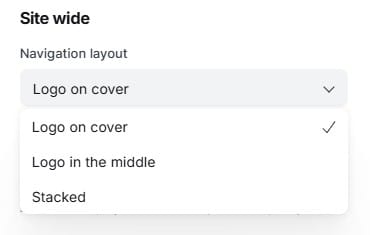
People Ghost Theme have 3 Optional Layout that you can choose.
Website Width
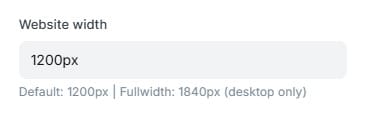
One powerful feature of this theme is the ability to set your layout width — from 1200px (like the default homepage) up to 1840px for a full-width website, as shown in the Fullwidth demo.
Rounded Image

As you can see, every image on your post has rounded corners — and yes, you can fully customize this to match your style. To remove the rounded effect, simply set the value to 0.
This setting works hand-in-hand with the Thumbnail Rounded option, allowing your design to stay consistent and adaptable across different styles.
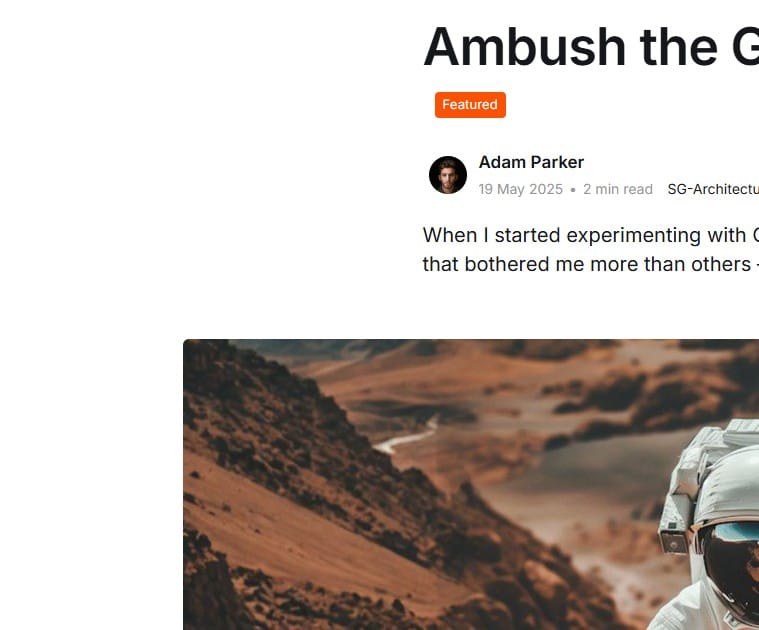
Thumbnail Info
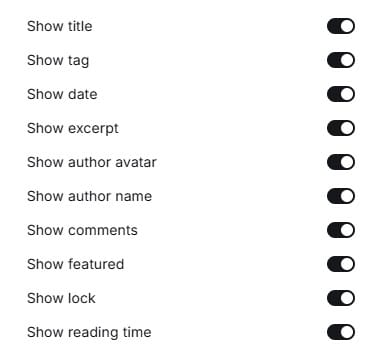
😍 Warning! This might become your favorite feature of the theme.
With this option, you can turn on or off the elements you want to display on your thumbnails.
As you can see on the Homepage, all elements are visible. But in the Logo Folio demo, only the Title & Date are shown as an example. You can even hide everything — just like we did in the Adventure Spot demo.
Thumbnail Per Row

Due to Ghost’s current limitations, we can only set one global value for the total number of posts per page — this applies to all pages.
As a result, the theme is limited to displaying up to 12 posts per page by default.If you’d like to display more than 12 posts, you would need to customize the theme yourself or hire an expert to help you extend it beyond the default limit.
To maintain the visual charm of your layout, we recommend using the following grid options:
- 1 thumbnail per row Like This Demo Vee Six Automotive
- 2 thumbnails per row
- 3 thumbnails per row Default / Homepage
- 4 thumbnails per row Logo Folio, Poster Goods and more from demo.
- 6 thumbnails per row Demo Portrait
Can i use 5 thumbnails per row?
Yes, you can — but keep in mind that it may affect the layout flow.
For example:
- Line 1: 5 thumbnails
- Line 2: 5 thumbnails
- Line 3: 2 thumbnails
To avoid an uneven last row and keep the layout balanced, we suggest setting the number of posts per page to 15 when using a 5-column layout. This the part we explain below.
Expert
For this feature, you can do it your own or may need to hire an expert if you want to go beyond the default theme settings. Ghost has certain limitations on what we can make available through your settings panel. We've taken it as far as possible to make things easy for you — but if you want to push the limits even further, an expert can help with small custom adjustments based on the steps we've explained above.
- Unzip the theme folder and open the
package.jsonfile. - Go to line 70 — you’ll see something like this:
...
"config": {
"posts_per_page": 12,
... - Change the number to the amount of posts you want to display per page, then save the file.
- Re-zip the theme folder and upload it via your Ghost theme settings.
Need expert help? We recommend contacting: support@sagesmask.com
Thumbnail Image Space
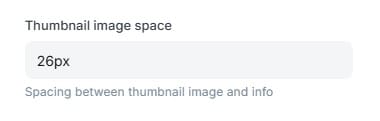
This setting controls the space between your image thumbnails and the information displayed below them. It’s especially useful for keeping the layout clean and adaptable when some elements (like title, tags, or date) are hidden.
Thumbnail Gap

This setting allows you to easily adjust the vertical and horizontal spacing between thumbnails. You can even set the values to 0 if you prefer a layout with no gaps at all.
For example, in the Adventure spot demo, the gap is set to 1.5vmin 1.5vmin, which creates a balanced and consistent space both vertically and horizontally between the images.
Thumbnail Aspect Ratio
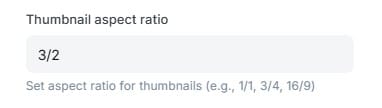
Every creator has their own preferred thumbnail ratio based on their content — and this setting gives you full control to customize it.
You can easily adjust the aspect ratio to match your style:
- Square thumbnails like in the Graphic Artist demo
- Portrait ratio as shown in the Portrait demo
- Landscape ratio in the Mr. Barbershop demo
- Even circle thumbnails like in the Building Material demo
This flexibility helps your content look exactly the way you want.
Rounded Thumbnails
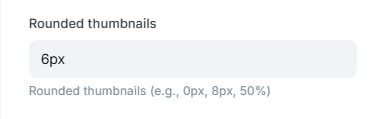
As you can see, every thumbnail on the homepage has rounded corners — and yes, you can customize this however you like. To remove the rounded effect, simply enter 0. You can also explore some demos that use different corner styles, such as Epic Escaper or Bulding Material. Want circular thumbnails? That’s possible too — just set the radius to 100%, as long as your image is scaled 1:1.
Social Media
Go To your Code injection, Site Footer and paste the code below.
<script type="application/json" id="social-data">
{
  "facebook": "https://facebook.com/yourname",
  "twitter": "https://twitter.com/yourname",
  "instagram": "https://instagram.com/yourname",
  "behance": "https://www.behance.net/yourname",
  "youtube": "https://www.youtube.com/@yourname",
  "pinterest": "https://www.pinterest.com/yourname",
  "dribbble": "https://dribbble.com/yourname"
}
</script>
As shown in the code above, simply replace the placeholder with your username and save the file. If you want to remove any of the social links, just delete the corresponding lines.
For example, if you want to remove Twitter and Behance, the code will look like this:
<script type="application/json" id="social-data">
{
  "facebook": "https://facebook.com/yourname",
  "instagram": "https://instagram.com/yourname",
  "youtube": "https://www.youtube.com/@yourname",
  "pinterest": "https://www.pinterest.com/yourname",
  "dribbble": "https://dribbble.com/yourname"
}
</script>
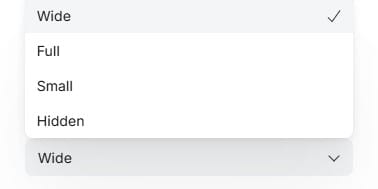
Post Image Style
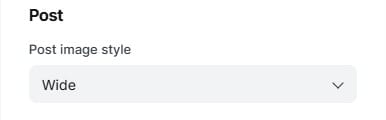
This setting offers 4 options for how cover images are displayed on your posts.
It works globally, meaning the selected style will apply to all posts across your entire website.
However, let’s say you’ve set all cover images to small globally, but you want certain posts to have a full-width or hidden cover — that’s totally possible.
We’ve included individual cover image settings for each post, giving you full flexibility. You can adjust them as needed using the options shown below:
Post Cover
As mentioned earlier, this setting allows you to override the global cover image setting on a per-post basis. To customize the cover image for an individual post:
- Open the post in the editor.
- Scroll down to the Post Settings panel.
- Find the Template section.
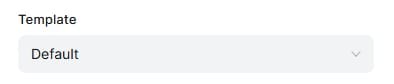
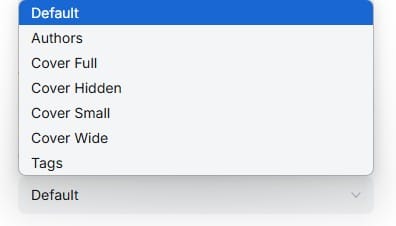
Click on Default to reveal the available template options.
Choose from: Full, Hidden, Small, or Wide — depending on how you want the cover image to appear for that post.
Authors Page & Tag Page
To enable tag and author pages like in the demo, follow these steps:
- Add new page.
- Scroll down to the Post Settings panel.
- Find the Template section tag for tag page and authors for authors page.
- Publish.
People Ghost Theme
We don’t offer custom theme services — but if you need advanced or extensive customization for this theme, we recommend reaching out to the expert who helped us build it.
You can contact them here: sagesmask.com/contact